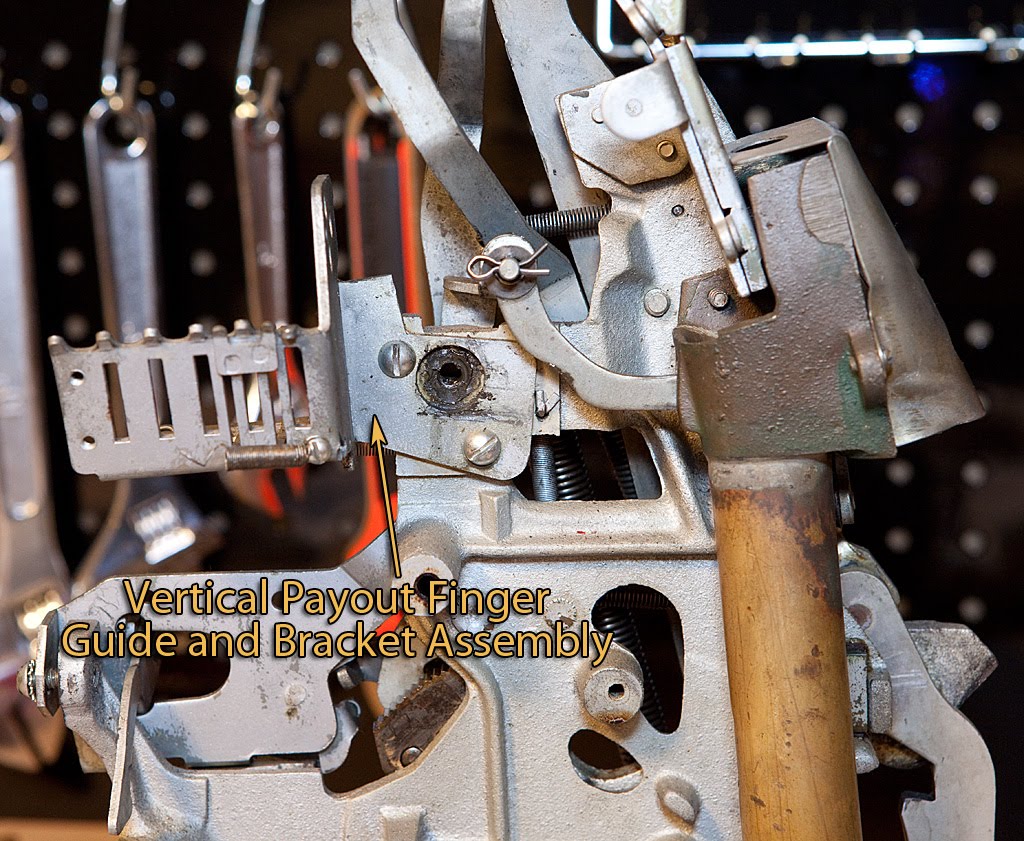
Now it’s time to remove the long-named “vertical payout pushback lever assembly” which is a complicated name for a relatively simple part.
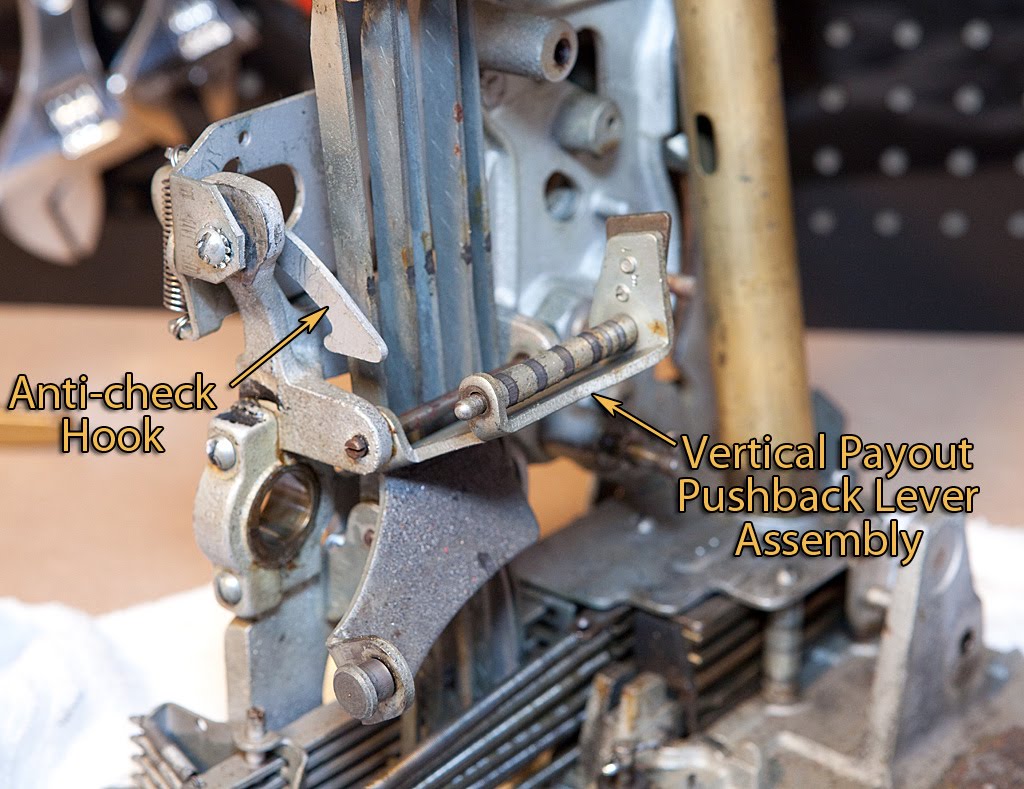
The name of this part tells you pretty much exactly what it does, specifically pushing the vertical fingers back away from the payout discs at the beginning of the cycle. It’s attached to the machine with a screw-in shaft, seen above just below our old friend, the anti-check hook. Now that the parts are uncovered, you should be able to see exactly how this troublesome part works. If you look at the portion of the pushback lever assembly that looks like a roller, you can see several places where it looks like something has “grooved” the roller. These spots are where the vertical fingers have worn the roller as it has pushed them back, time after time. If you look at the end of the roller, though, you see something that looks like a rounded nub. If you rotate the pushback lever assembly so that it pushes back on the fingers, you will find that the anti-check hook will slip right over that nub, holding the roller (and consequentially the fingers) in place. Since the fingers can’t travel forward to check for a payoff condition, the machine will never pay off.
We’ll remove that part later.
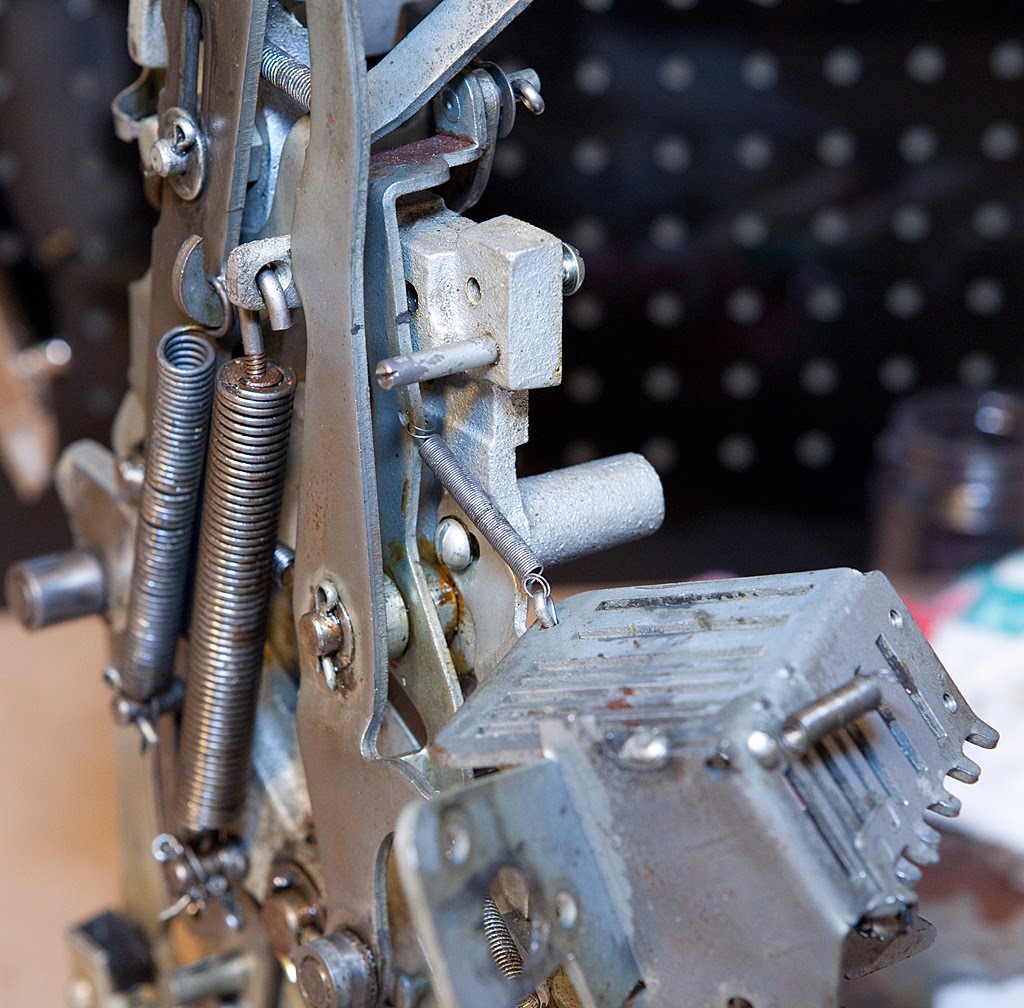
Back to the pushback lever assembly, it’s a pretty simple thing to remove but some caution is in order. The slot in the threaded shaft is very small, and you need a screwdriver that will fit all the way in the slot before you attempt to unscrew it. This shaft and the next one we will tackle have a tendency to stick, and if you aren’t careful you can break them fairly easily. I’d recommend that you not use an electric screwdriver for any slot machine disassembly tasks, but that goes double for these shafts. If the shaft gives you trouble, you may want to use some sort of penetrating oil to loosen it up, or in a pinch you can actually grab the center of the shaft with a pair of vise-grips and turn it a quarter-turn at a time to loosen it up if necessary.
Anyway, carefully unscrew the shaft and remove the pushback lever assembly.

It’s not a bad idea to replace the shaft after you’ve removed the part, but you might want to hold off for just a few minutes since it can get in the way when we remove the vertical payout fingers. I didn’t take that advice, and it caused me to miss something important. More on that in a minute.
The process for removing the vertical fingers starts at the top.
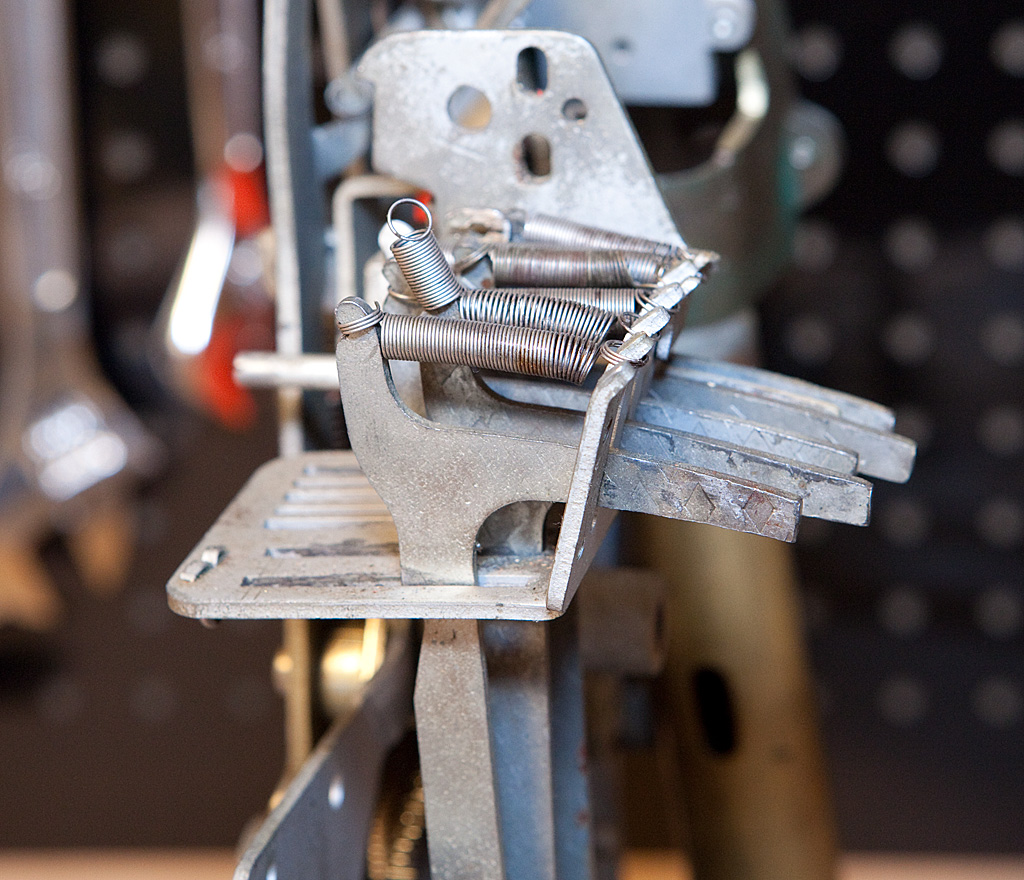
Before we go any further, remove the springs from the top of the fingers and store them in your spring jar. I’m planning to replace a good many of these anyway, but you never know when you are going to need an extra spring. (That’s called foreshadowing for those of you who failed Freshman English.)
The removal of the vertical payout fingers is a little involved. They are secured by a screw-in shaft like the part we just removed, although this shaft sometimes also has a lock nut on the back of it. Check for that before trying to unscrew the shaft. The same cautions apply for this shaft… it’s easy to damage.
Anyway, once you have the shaft removed, the payout fingers can be lifted out almost straight up, except for one thing.

Yup, while I was worrying about getting the fingers around that first shaft that I’d already replaced, I didn’t notice that there was a spring attached at the bottom of the front finger. This spring isn’t always present, and I just plain forgot about it. As you can see, I pretty much destroyed the spring.
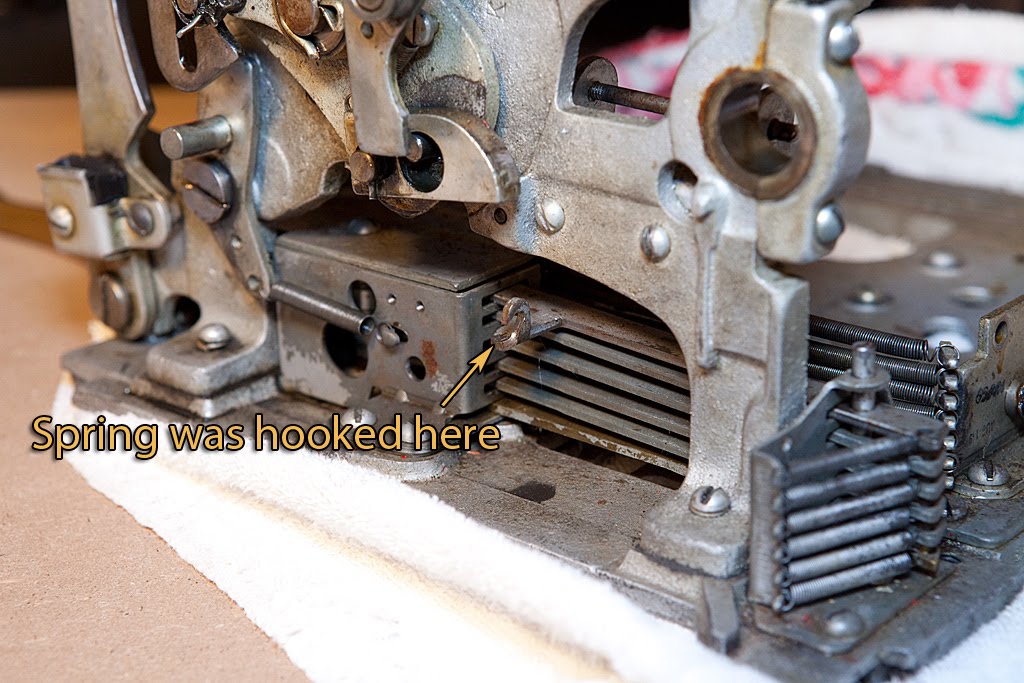
Luckily this isn’t a big deal, and I probably have a spare, but I’m still irked at myself for missing it.
Enough with the spilled milk, though… let’s take a closer look at the vertical fingers.
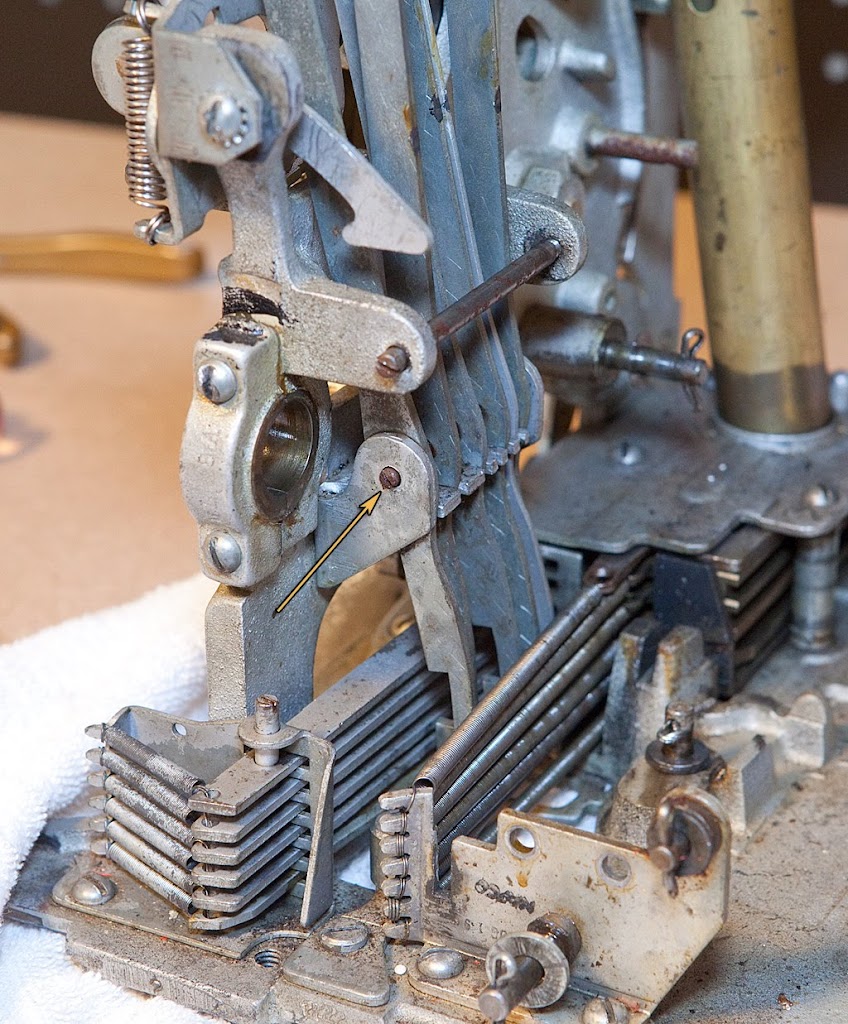
Take a look at the photo of the fingers out of the machine above and notice that I’ve threaded some wire through them to keep them in the same order they were in on the machine. This is another good habit to cultivate. If you happen to forget, however, the order is generally easy to determine if you look at the bottom of the fingers.
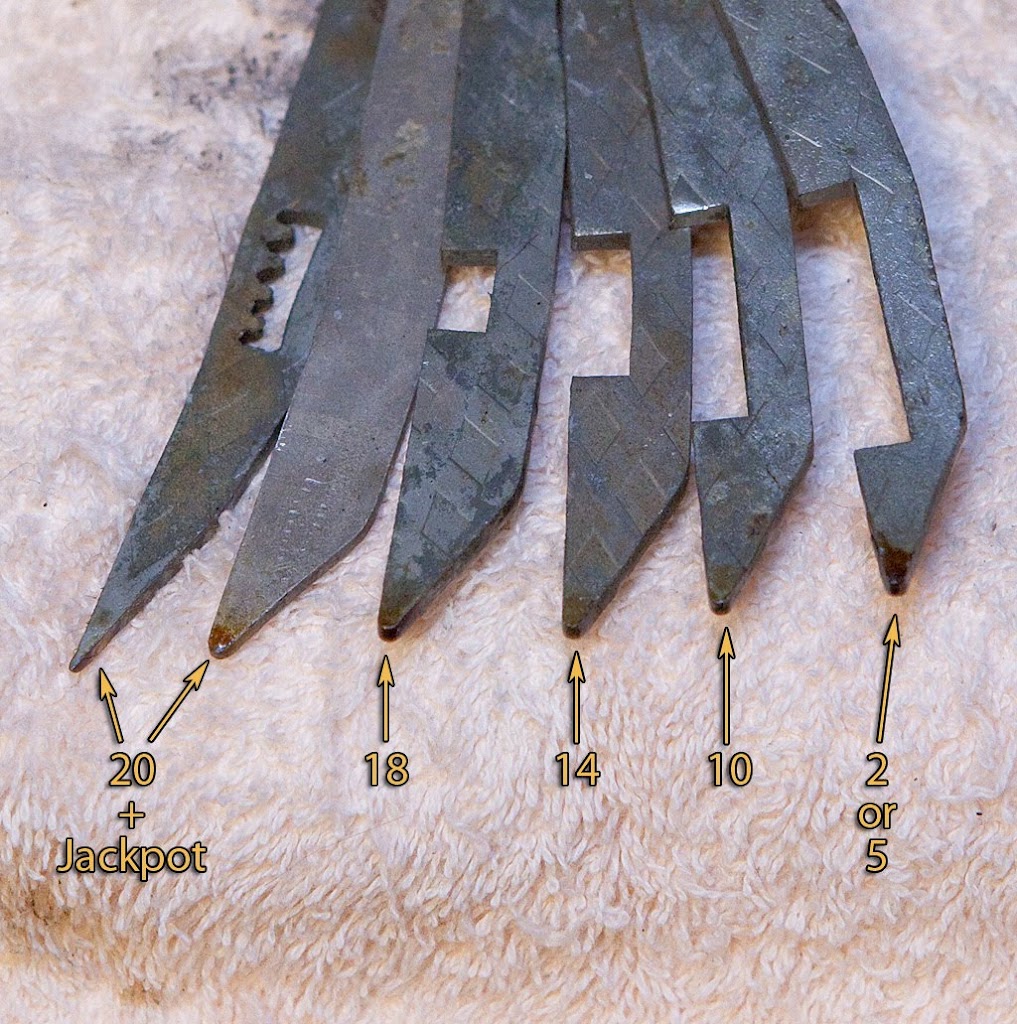
If you look at the notches above (not counting the saw-tooth stuff on the far left… that’s just for hooking the problematic spring) you can see that the notches get smaller as you go left towards the front of the machine. The actual “working” part of the vertical fingers is the spot just below those notches. Notice that it gets bigger as you travel to the left. This part of the fingers strikes the horizontal levers, which in turn release the payout slides. The more slides that are released, the bigger the payoff.
The fingers above correspond to the symbols for bars, melons, bells, plums, oranges and cherries respectively. If you look at the two far-left fingers, you can see that there is no notch at all, meaning that when activated these fingers hit ALL six of the horizontal levers, causing ALL six of the coin slides to travel backwards and drop their contents, including the very top slide which also trips the jackpot mechanism.If you total up the coins in all six slides, you end up with 20 quarters although this varies from machine to machine.
The finger for bells triggers five slides for 18 coins, the plum finger triggers four slides for 14 coins, the orange finger triggers three slides for 10 coins… but then we come to the cherries finger, which has two different possible payoffs.
The cherries finger is a special case, and can actually have two different states based upon how far it travels. If it moves just a little bit, as it does when there is a single cherry on the first reel but no cherry on the second reel, only the very bottom horizontal lever is triggered for a payout of 2 coins. The bottom horizontal lever has a special extension (which we will see later) for this exact purpose. When the finger finds a cherry on both the first and second reels, though, it travels far enough that it trips both the first and second horizontal levers, giving us a payout of 5 coins.
Based upon the above, we can also figure out how many coins each payout slide holds based upon the payoffs of the machine. From top to bottom, here are the coin capacities of the six payout slides:
2 — three bars or melons
4 — three bells
4 — three plums
5 — three orange
3 — two cherries
2 — one cherry
Pick any winning combination above, then add up the coins listed to the left of it plus all coins listed below it and you should end up with the correct payout totals, not counting the jackpot of course.
If this doesn’t make sense to you now, don’t worry about it too much. We’ll be taking a closer look at both the horizontal fingers and the payout slides later. The important thing to remember is that if you don’t keep the vertical fingers and payout slides in the proper order your machine will pay the wrong number of coins for winning combinations.
For now, let’s remove the vertical finger guide assembly.
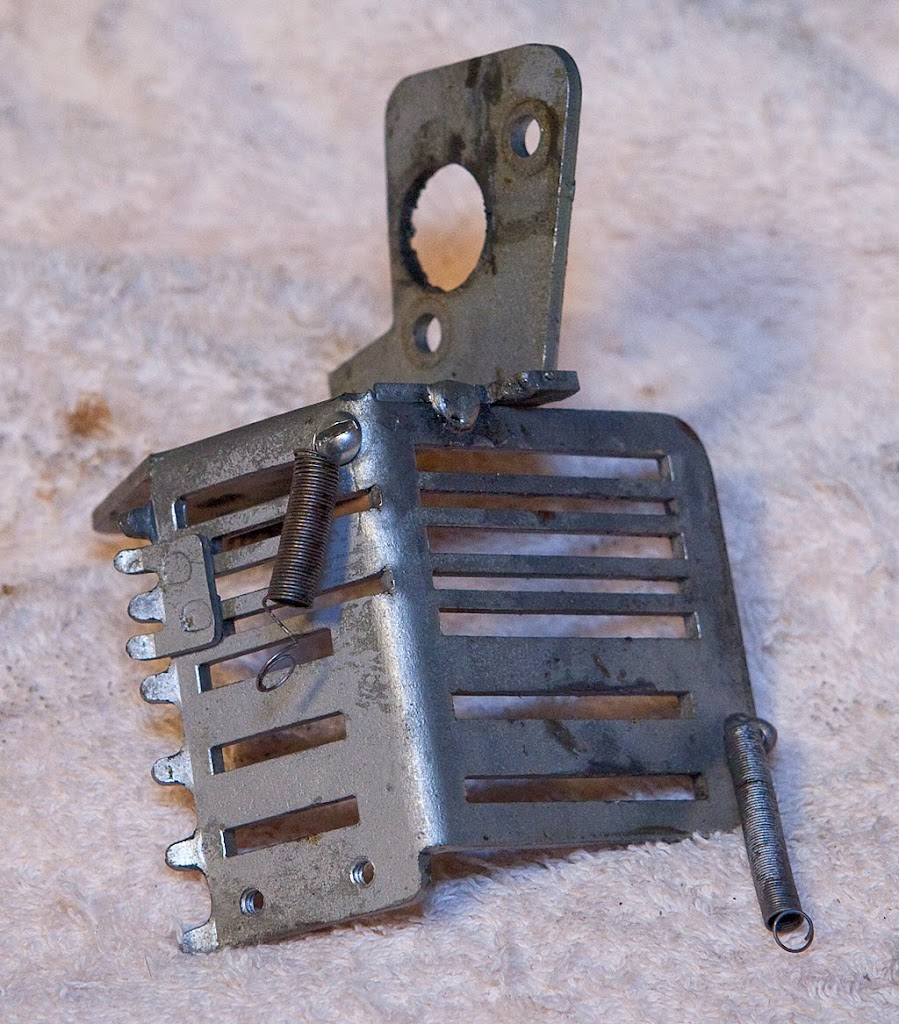
We’ve just got a couple of screws to remove, and then the guide should be hanging by a spring.
You’ll have to detach one end of the spring, but it doesn’t really matter which one. Here’s the finger guide by itself after removal, along with more errant grey paint.
We could have just as easily removed the finger guide before removing the fingers themselves, and that might well have been easier. When completely disassembling a mechanism, the order of parts removed just isn’t that critical.
That was some of the more complicate disassembly that we’ve done so far. Next we’ll tackle a few easy things.
i have a part that i can not find where to make it fit. iF you have a phone call me.My number 2392457664